The Day I Painted My Kitchen Tile Floor
My body feels like I ran a marathon and completed a strong man competition. I did neither. I painted my kitchen tile floors! In this post I am going to give you my real thoughts and the process it took to paint them. First off…..this is nothing new. Which is why I almost didnt paint them. I am not really the “jump on the band wagon” type. But I have had the stencil for 2 years……in those 2 years I had baby. So it just didnt get done. Fast forward to Saturday morning…..Pinteresting. That will suck you in every time. You either are pulling out painting supplies or baking supplies……am I right??
So 2 years ago when I purchased the stencil from Cutting Edge Stencils I also bought tile primer from Sherwin Williams. Apparently in those 2 years the primer had gone bad. I had started to prime the floors and it wasnt drying. At all. So spent the next hour trying to wipe up the bad primer. So……I wasnt in the mood to paint after that and needed new supplies obviously. Luckily my husband was working so was able to pick up more primer before coming home.
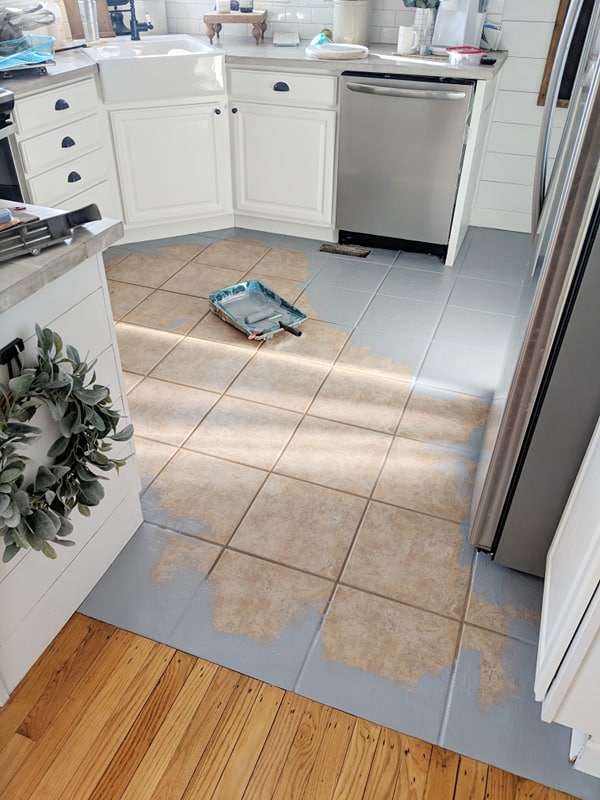
Sunday morning……here we go. Again! I cleaned the floor really well Saturday morning with dish soap and hot water. Then again Sunday morning with Awesome cleaner. This cleaner is really awesome. Its what I also used to de-grease my cabinets before painting. Rinsed the floor with water and put on fans to dry. Time to prime! Again. This time I used oil based. I had it tinted gray since I was going dark. My advice is to do this on a day you can open windows and point a fan outside. The primer was strong!
The products used for my floors.
Priming.
Other products I used……
Foam rollers…3 larger (6”) and 1 (3)” for stencil
Painting Tape (I didnt use this but you may want to)
Paint pan liners or tin foil….bc I dont wash out paint pans.
Brush for tight areas for primer and base coat.
Small art brushes for stencil
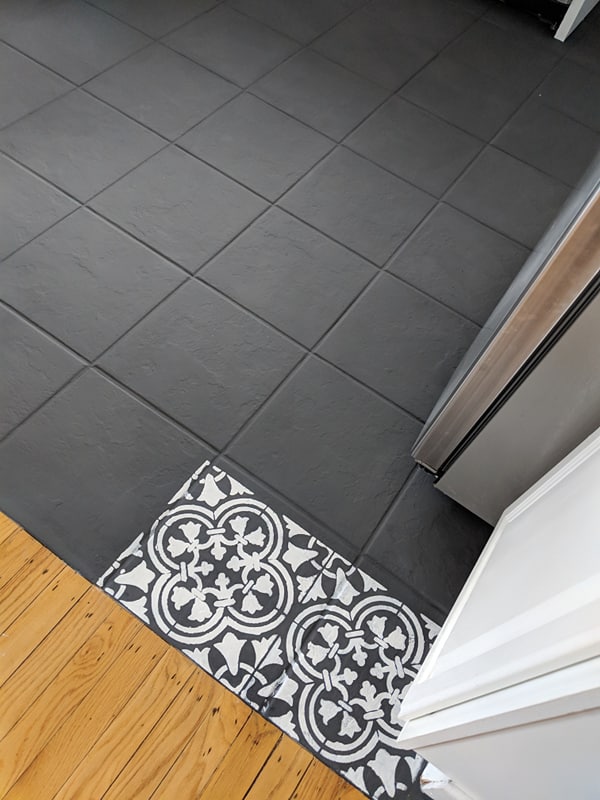
Once primed I let that dry for 2 hours. If I was to do it over again I would have done this the night before and let dry and air out over night. Mainly because I am not a patient person. Once the primer was dry I applied the chalk paint. You could use normal latex paint too. I had the chalk paint and I really liked the color. The chalk paint went on like a dream and needed 2 coats. Chalk paint dried fast and Asher was napping so I got to work with the stencil. I used what I had for white paint. Sherwin Williams Pure White mixed to Valspar paint. If I was to do it again……I would order 2 stencils. Paint does get behind the stencil so I would let one dry while I used the other one. I did wipe it off very carefully inbetween…..and also broke it doing this. Did that 2nd tile in. Excellent.
As you can see the stencil is smaller than my actual tile. This might bother someone but now that it is finished you can not tell at all. With that being said having it the same size would mean I could have moved around the kitchen more while stenciling and waiting for them to dry. But couldnt do that with this size. I got about 1/2 done before Asher woke up from his nap and luckily my Mom came over to help watch him so I could finish. Tips on stenciling….I just held it down with my hands. Go LIGHT on the paint. Do not put a ton on your roller. The more you put on the roller the more bleeding under the stencil. Remember cement tile isnt perfect…..so dont stress about this being completely uniform. Lift up super fast without dragging it.
Now the tricky part……getting close to the cabinets and trying to get under the appliances. The “right” way would have been to move the appliances out. But lets be real. That sounds awful and my husband worked all weekend so that just wasnt happening. I ended up cutting the stencil in half to get in the corners and in the tight spaces. Is it perfect? Absolutely NOT. I had to get over the fact right away it just wasnt going to be perfect. The stencil bled in areas. I free handed hard to get to areas. Which looks horrible. But honestly I will be the only one to ever tell.
On to the poly. Make sure you use a WATER BASED poly. This is SO important. Normal Poly will yellow. Water based can too so you want to use thin coats. I also used a foam roller to apply this. I used foam rollers for everything on this project. I did 4 coats. 3 last night and 1 this morning. The top coat takes 2 weeks to cure so we will be very careful for 2 weeks. IMPORTANT! Chalk paint needs a topcoat or it smears when wet. So the first coat of poly……make sure you dont go over the same area twice. Get that first coat on to seal it then you are fine. Another thing is you want to finish the poly asap before oils from bare feet, etc get on the floors. Our kitchen is the main walkway through the house so we shall see if it stands the test of time. I will keep you updated!
A few more thoughts……We do love it. Is it something I would want forever? Probably not. We have a kitchen remodel planned in the future and will be extending the wood into the kitchen. But for now I LOVE the change. Makes a HUGE statement for under $100! Stencil I think was $20……primer, paint and supples $75. (I had the Pure White paint)
Whew! Hope this helps someone that is thinking about painting your tile! Its such a amazing transformation on a budget…..Just make sure you do not plan anything for the next day. Your body will thank you. Feel free to drop any questions below that I might have missed! Thanks for reading!
—Erica


